Wednesday, June 29, 2011

Congrats Nikki & CJ!

My best friend since the 4th grade recently got engaged!  I am so excited for her and her soon to be husband.  They are a great couple and I couldn't be more happy for them.  Congrats Nikki & CJ!

 
We went out to dinner this past weekend to celebrate their recent engagement so I thought I would try out the new Cake Pop maker.  First, you will need to prepare some cake batter and pre-heat the Cake Pop maker for a few minutes. 
Once the Cake Pop maker is heated, pour approximately 1 Tbsp. of batter into each reservoir.

 
Once all reservoirs are filled, close the lid and let the cake balls bake for approximately 5 minutes.  As you can see, I way over filled the reservoirs with batter!

When the cake balls are done baking, remove them from the Cake Pop maker.  When I lifted the lid, the entire surface was covered with batter.  I used a toothpick to trace around each cake ball and remove it from the Cake Pop maker. 

After a few tries I got a little better at judging how much cake batter to fill each reservoir with. 
For the most part, the cake balls turned out really great.  There were a couple here and there that were slightly deformed, but most of them had a nice circular shape.  I did find that the Cake Pop maker doesn't bake the cake balls evenly.  The reservoirs in the back seem to cook faster than those in the front.  However, they were all thoroughly baked and none were burnt. 
Allow the cake balls to cool and then place them in the freezer for a few minutes.  While the cake balls are in the freezer melt chocolate in a microwave safe cup.  Dip the end of lollipop sticks in the melted chocolate and then insert into the cake balls.  Place the cake balls with the sticks into the freezer and allow the chocolate to harden.  This step will help to ensure that the cake balls do not fall off the sticks when you dip them into the chocolate.

Remove cake balls with sticks from the freezer, and dip the entire cake ball into the melted chocolate.  Decorate cake balls will sprinkles or candies as desired.  Allow chocolate to harden.  If you do not have a Cake Pop stand or piece of Styrofoam to stick the Cake Pops in, fill a cup with rice.  This will allow you to stick the cake balls into the cup without worrying about them tipping over.
Once I finished decorating all of my Cake Pops I placed them in this fun cup and gave them to my friend as an engagement gift!  Congrats again to Nikki & CJ!  Can't wait for the wedding. 

For great Cake Pop ideas visit Bakerella's website.  This is by far one of my favorite baking websites. 

Wednesday, June 22, 2011

Cake Pop Maker

If you are into baking you are probably aware of the Cake Pop craze.  My mom came across this Babycakes Cake Pop Maker at Kohl's last week.  They were sold out already so we purchased the display model.  I love making cake pops and am really excited to try this out!  I hope it works well as it would save a lot of time.  Stay tuned for my review on the cake pop maker. 

Wednesday, June 15, 2011

Cookies & Cream Cupcakes

For my brother's birthday, I made baseball themed Cookies & Cream cupcakes. 

I baked mini-cupcakes so I bought bite sized Oreos.  I would recommend using full sized Oreos if making regular cupcakes.
 Start by placing oreos into a plastic bag.

Crush the Oreos while they are in the bag.  You may want to use two bags in case one rips/bursts open while you are crushing the oreos.  Another option is to use a food processor to grind the Oreos.  Crush Oreos until you have approximately 1 C. 

Add crushed Oreos to your favorite vanilla cake mix.

For a crunchy addition to the cupcakes, split Oreos in half, remove the cream filling, and place one half of the cookie into the bottom of each cupcake tin.

 Here is what the cupcakes will look like when they are done baking.

I decorated the cupcakes with 3 different designs:
I made one batch of frosting and dyed a third of it green for the grass cupcakes.  The grass cupcakes are very easy to make.  You will need a Wilton #233 frosting tip.  Simply squeeze the frosting onto the cupcakes to fill the entire surface. 
For the baseball cupcakes, start by frosting the cupcake with white frosting and then pipe on the stitching using red piping gel. 
For the New York Yankee logo I melted black Wilton Candy melts and piped the design onto parchment paper.  When the chocolate hardens remove the chocolate from the parchment paper and place on the cupcake.  A helpful tip - draw your design on a piece of paper and place under the parchment paper.  You can then trace the design with the chocolate. 

My brother had a softball tournament on his birthday so shared the cupcakes with the guys.  They were a homerun!  

Thursday, June 2, 2011

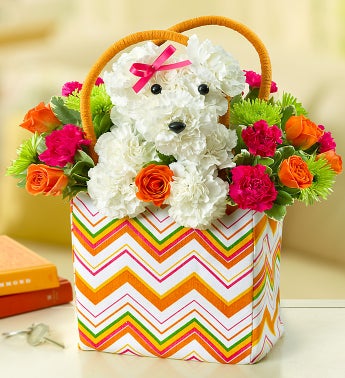
a-DOG-able™


I don't have any yummy cupcakes or desserts to share with you this week, so I thought I would share this adorable flower bouquet that my husband surprised me with!  You can order this bouquet from 1-800 Flowers.com .  The little puppy dog sculpted out of carnations is so adorable.  This special delivery made my day.  Love you Matt!